1. Complete UFW Guide
Understand what UFW does and how to use it safely on Ubuntu.
UFW stands for Uncomplicated Firewall. It is the Ubuntu-friendly firewall management tool that simplifies Linux firewall administration. It lets you control incoming and outgoing traffic, open only the ports you need, restrict access by IP address, apply interface-specific rules, monitor firewall events, and keep servers safer with simpler commands.
Block or allow connections to your machine.
Define what your server can access.
Open web, SSH, DB, or app ports only when needed.
Whitelist office IPs or block suspicious sources.
Track dropped or accepted connections.
Easy enough for everyday use, strong enough for production basics.
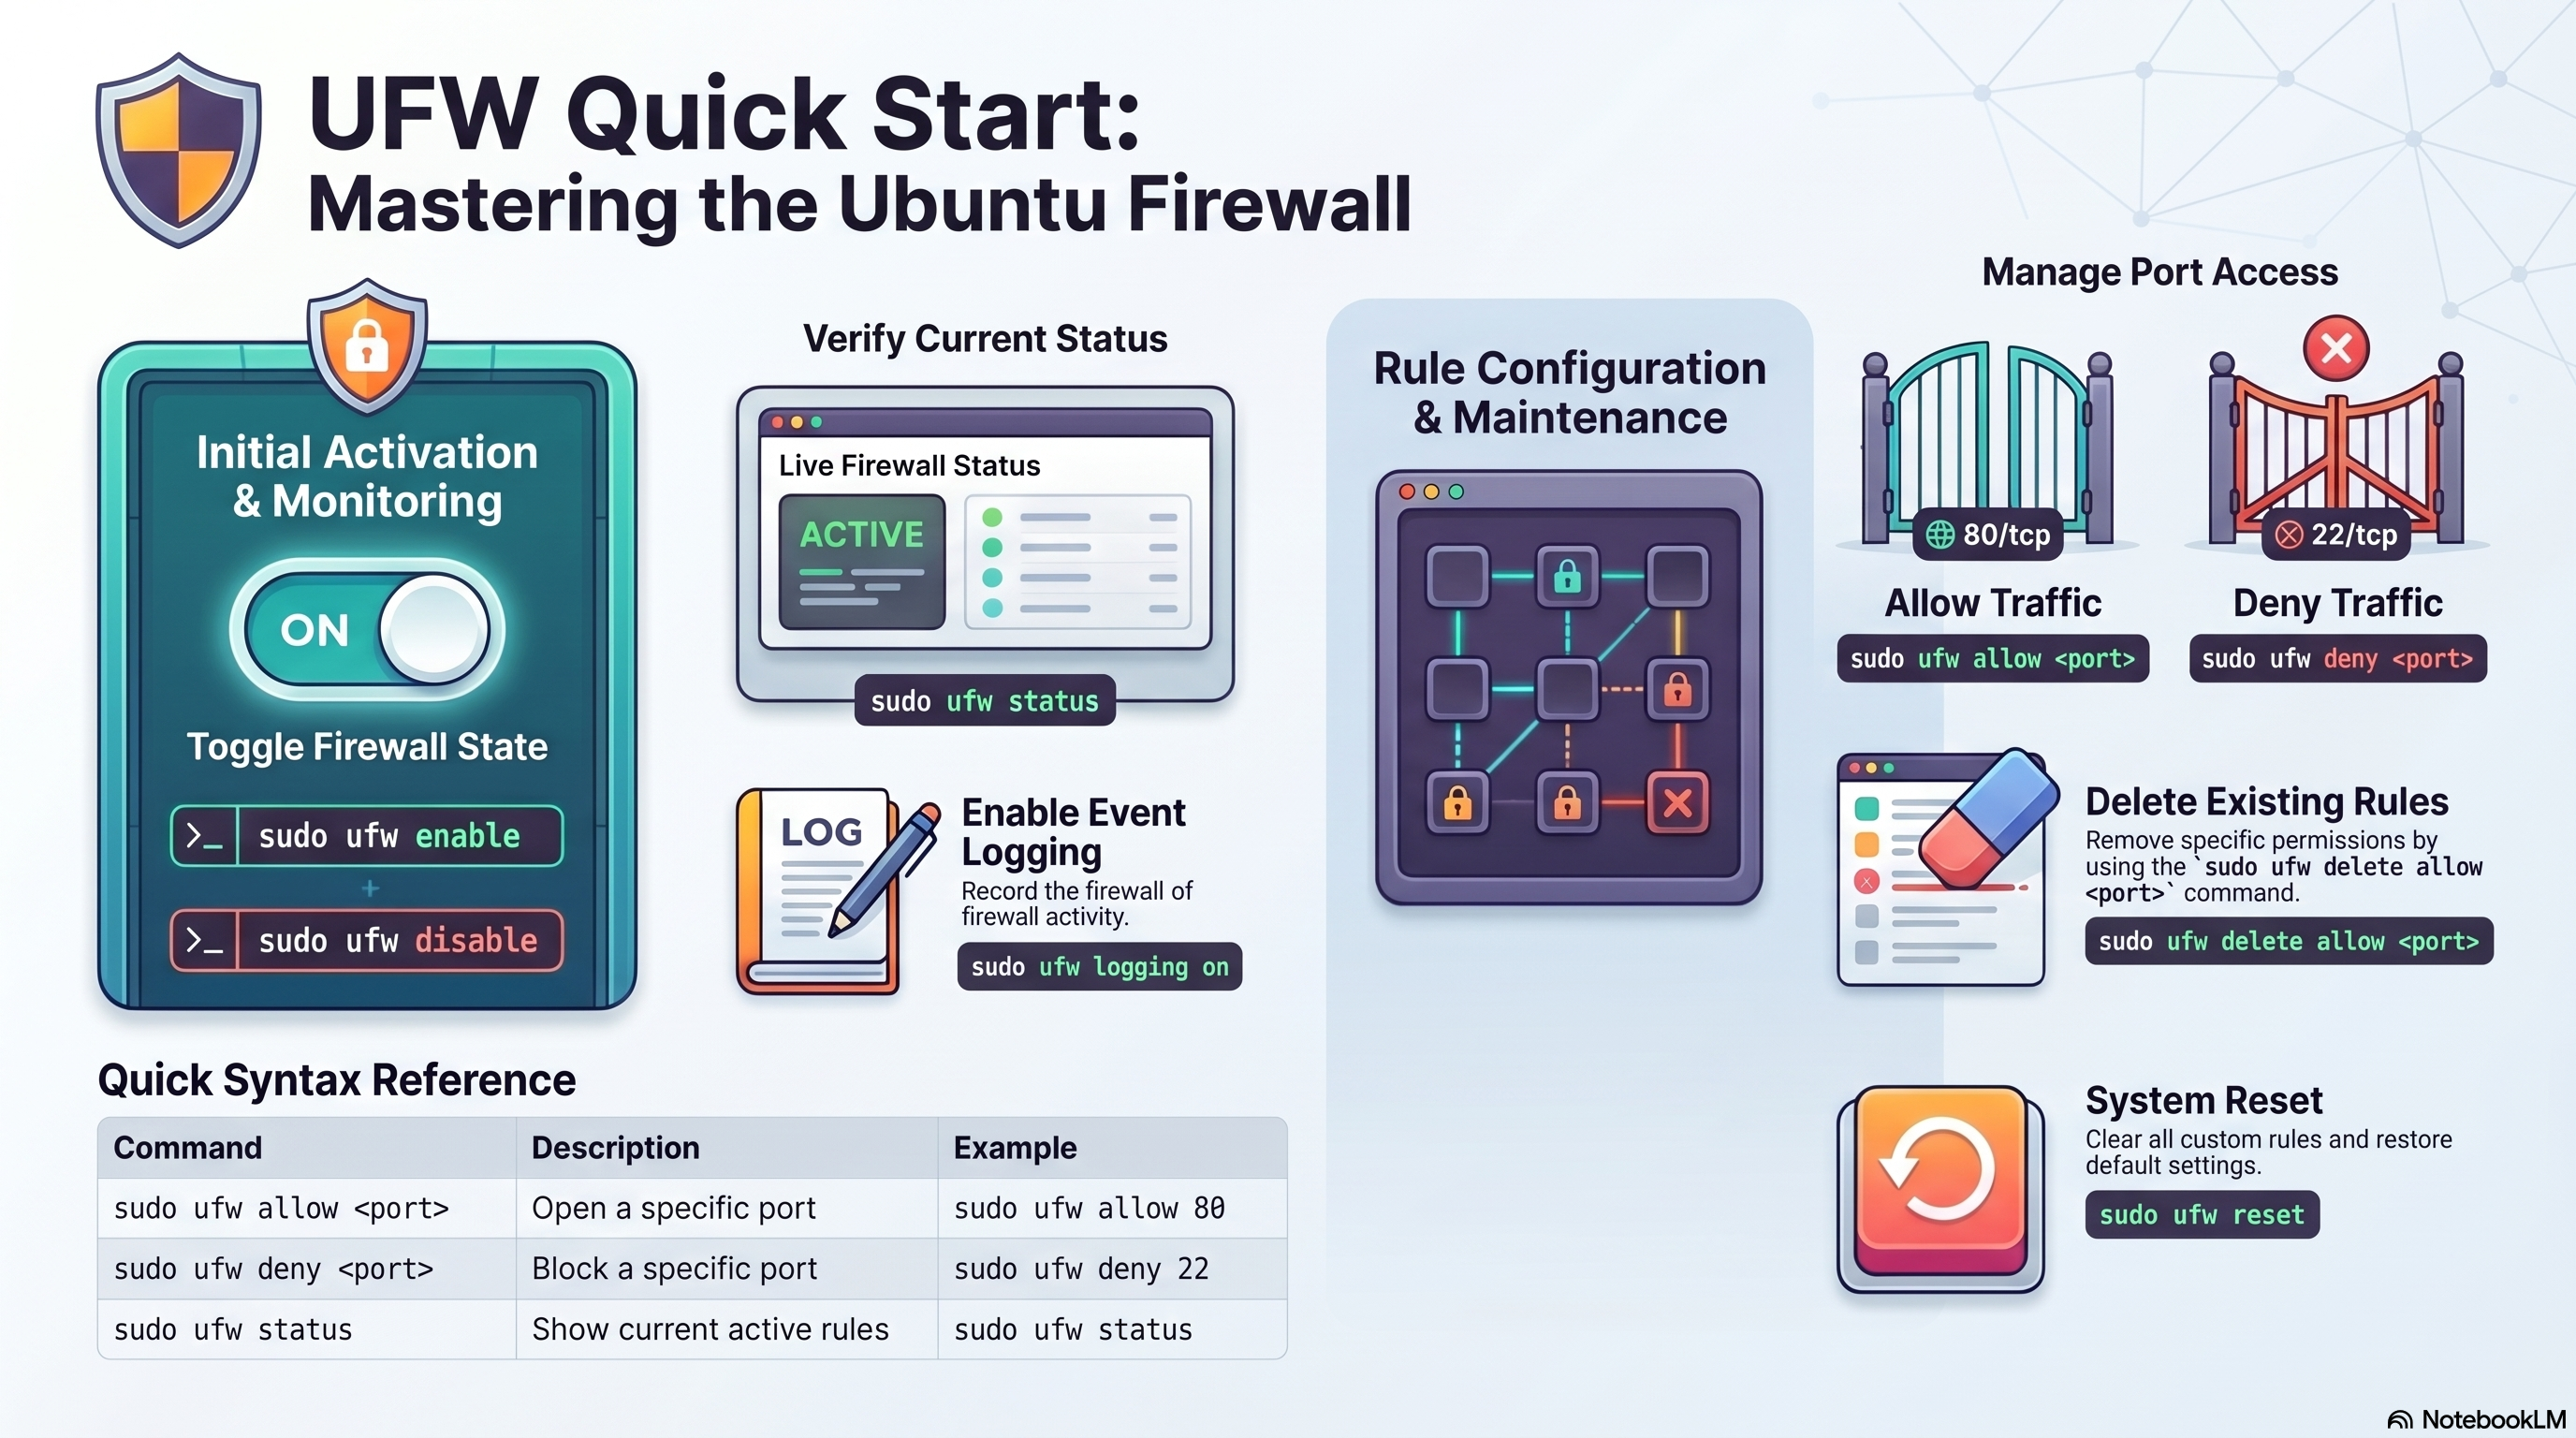
2. Status and Control
sudo ufw status
sudo ufw status verbose
sudo ufw status numbered
Use status for a simple overview, verbose for default policies and logging details, and numbered when you want to remove rules by index.
sudo ufw enable
sudo ufw disable
sudo ufw reset
enable activates the firewall, disable stops it, and reset removes all custom rules and restores defaults.
3. Traffic Rules
sudo ufw allow 22
sudo ufw allow 80
sudo ufw allow 443
sudo ufw allow 3306
sudo ufw allow 5432
sudo ufw allow 8080/tcp
sudo ufw allow 8080/udp

sudo ufw allow ssh
sudo ufw allow http
sudo ufw allow https
Open only the services that are required. Numeric ports are explicit, while service names like ssh, http, and https are easier to read.
sudo ufw deny 3306
sudo ufw deny 23

sudo ufw delete allow 80
sudo ufw delete deny 3306
sudo ufw delete 2
Use deny rules to block unwanted access. Delete outdated rules when your service layout changes. Deleting by number is convenient after running sudo ufw status numbered.
sudo ufw limit ssh
sudo ufw limit 22/tcp
limit allows connections but blocks an IP that makes 6 or more attempts within 30 seconds. Use it on SSH to protect against brute-force attacks without fully closing the port.
sudo ufw deny 23
sudo ufw reject 23
deny silently drops the packet — the sender gets no response and times out. reject sends back an error immediately, so the sender knows the port is closed. Use deny on public interfaces to avoid giving attackers information.
| Command | Description | Typical Use |
|---|---|---|
sudo ufw allow <port> | Open a specific port | Allow HTTP, HTTPS, SSH |
sudo ufw deny <port> | Block a port silently | Block Telnet or DB ports |
sudo ufw reject <port> | Block and send error back | Internal network closed ports |
sudo ufw limit <port> | Allow but rate-limit connections | Brute-force protection on SSH |
sudo ufw status | Show current rules | Check active firewall state |
sudo ufw delete allow <port> | Remove an allow rule | Close no-longer-needed access |
sudo ufw reset | Clear all rules | Rebuild policy from scratch |
4. Advanced Filtering
sudo ufw allow from 192.168.1.100
sudo ufw allow from 192.168.1.100 to any port 22
sudo ufw allow from 192.168.1.0/24
sudo ufw deny from 10.0.0.5
Best for whitelisting office networks, restricting admin access, or blocking suspicious hosts.
sudo ufw allow in on eth0 to any port 80
sudo ufw deny in on eth0 to any port 3306

sudo ufw allow 6000:6007/tcp
sudo ufw allow 6000:6007/udp
Interface-specific rules are useful on multi-NIC servers. Port ranges help when apps need several ports at once.
sudo ufw default deny incoming
sudo ufw default allow outgoing
This is the standard secure baseline. Incoming traffic is blocked unless explicitly allowed. Outgoing traffic is permitted so the server can still reach the internet.
5. Logging and Configuration
sudo ufw logging on
sudo ufw logging off
sudo ufw logging low
sudo ufw logging medium
sudo ufw logging high
sudo ufw logging full

sudo tail -f /var/log/ufw.log
Logging helps diagnose blocked traffic, repeated scans, or mistakes in your rules. Use higher log levels carefully on busy systems.
- Review open ports after every deployment change.
- Delete rules for retired services.
- Check logs when an app appears unreachable.
- Keep SSH restricted where possible.
- Do not expose databases publicly unless absolutely required.
# Check current setting
sudo nano /etc/default/ufw

# Ensure this line is set:
IPV6=yes

# Reload after changing
sudo ufw disable && sudo ufw enable
UFW applies rules to both IPv4 and IPv6 when IPV6=yes is set in /etc/default/ufw. This is the default on modern Ubuntu, but worth verifying on older installs or custom images. Without it, your IPv6 interfaces may be unprotected even when UFW is enabled.
6. Common Setups
sudo ufw allow ssh
sudo ufw allow http
sudo ufw allow https
sudo ufw enable
sudo ufw status
A clean baseline for Ubuntu servers running Apache or Nginx.
sudo ufw allow ssh
sudo ufw allow from 192.168.1.0/24 to any port 3306
sudo ufw deny 3306
sudo ufw enable
Lets only your private subnet reach MySQL, while external access stays blocked.
7. Ubuntu UFW for Developers Guide
These are practical firewall setups for common development and deployment stacks: Node.js, Python, Docker, Nginx, MySQL, SSH, and application profiles.
# Typical Node.js app port
sudo ufw allow 3000/tcp

# If behind Nginx reverse proxy, only allow Nginx ports publicly
sudo ufw allow 80
sudo ufw allow 443

# Optional: restrict direct app port to localhost architecture only
# Better app design: bind Node to 127.0.0.1 and expose only Nginx
In production, it is better to place Node.js behind Nginx and expose only ports 80 and 443 publicly. Keep the app port private whenever possible.
# Development server examples
sudo ufw allow 5000/tcp   # Flask
sudo ufw allow 8000/tcp   # Django / Gunicorn common

# Production pattern
sudo ufw allow 80
sudo ufw allow 443
sudo ufw allow ssh
For production, put Flask or Django behind Gunicorn or uWSGI, then proxy it through Nginx. Avoid exposing development server ports directly to the internet.
# Allow only the published ports you really need
sudo ufw allow 80
sudo ufw allow 443
sudo ufw allow ssh

# Example if a container publishes 8080
sudo ufw allow 8080/tcp
Docker can modify iptables rules directly, so published container ports may bypass naive firewall assumptions. Always test real exposure after starting containers.
sudo ufw allow 'Nginx Full'
# or equivalently
sudo ufw allow 80
sudo ufw allow 443
Nginx should usually be the only public-facing service. It receives HTTP/HTTPS traffic and forwards requests to private internal app services.
# Best: no public exposure
sudo ufw deny 3306

# Office or private subnet only
sudo ufw allow from 192.168.1.0/24 to any port 3306
Databases should almost never be world-accessible. Restrict them to internal servers, VPN networks, or administrative subnets.
# List all available application profiles
sudo ufw app list

# Show details for a specific profile
sudo ufw app info Nginx
sudo ufw app info 'Nginx Full'
sudo ufw app info OpenSSH

# Allow by profile name instead of port number
sudo ufw allow 'Nginx Full'
sudo ufw allow 'Nginx HTTP'
sudo ufw allow OpenSSH
Application profiles are pre-defined rule sets installed by packages like Nginx and OpenSSH. Using profile names instead of port numbers makes rules more readable and easier to audit. Nginx Full opens both port 80 and 443; Nginx HTTP opens only port 80.
sudo ufw allow ssh

# Better: allow SSH from office or home IP only
sudo ufw allow from 203.0.113.10 to any port 22

# Optional custom SSH port example
sudo ufw allow 2222/tcp

# Rate limit to block brute-force attempts
sudo ufw limit ssh
SSH is the most critical admin entry point. Restrict it by IP when possible and pair it with key-based authentication and disabled password login. Use ufw limit ssh as an extra layer — it automatically blocks IPs that make 6 or more connection attempts within 30 seconds.
8. Advanced UFW Cheat Sheet with Examples + Security Hardening
# Show rules in detail
sudo ufw status verbose
sudo ufw status numbered

# Set strong defaults
sudo ufw default deny incoming
sudo ufw default allow outgoing

# Allow a subnet to a specific port
sudo ufw allow from 10.10.0.0/16 to any port 5432

# Deny a malicious IP
sudo ufw deny from 198.51.100.25

# Allow traffic only on a specific interface
sudo ufw allow in on eth0 to any port 443

# Allow a TCP or UDP port range
sudo ufw allow 6000:6010/tcp
sudo ufw allow 6000:6010/udp

# Delete a numbered rule
sudo ufw delete 3

# Reset everything
sudo ufw reset
- Use deny incoming and allow outgoing as your baseline.
- Open only ports required by running services.
- Keep databases private to LAN, VPN, or app subnet only.
- Restrict SSH to trusted IPs when possible.
- Put app servers behind Nginx or another reverse proxy.
- Avoid exposing development ports like 3000, 5000, and 8000 publicly on production systems.
- Review rules after every deployment or architecture change.
- Enable logging when troubleshooting or monitoring suspicious access.
- Combine UFW with strong SSH settings, updates, and service-level authentication.
- Test access after rule changes so you do not accidentally lock out users or services.
sudo ufw default deny incoming
sudo ufw default allow outgoing
sudo ufw allow from 203.0.113.10 to any port 22
sudo ufw allow 80
sudo ufw allow 443
sudo ufw enable
sudo ufw status verbose
Good for a typical public web server with restricted SSH and only web traffic exposed.
sudo ufw default deny incoming
sudo ufw default allow outgoing
sudo ufw allow ssh
sudo ufw allow 80
sudo ufw allow 443
sudo ufw allow from 10.0.0.0/24 to any port 3306
sudo ufw deny 3306
sudo ufw enable
Keeps the database hidden from the public while still allowing web traffic and admin access.
Final Notes
The safest UFW strategy is simple: start from deny-by-default, allow only what you truly need, and review rules whenever your deployment changes.